Add some Spark-le to your life.

Categories Apache Spark, NodeJS, Raspberry Pi, Scala

Hey folks, I know I have been under the radar for a really long time. Its because I have attempted a lot of different projects throughout 2018 and the later half of 2017. Some of the projects have not had the desired level of success. However there is no such thing as failure there are only lessons waiting to be learned.

With that being said this was a project I had done in the later half of 2017.  The idea was given to me by a former colleague. The goal was to scrape data from a bar’s website which shared the amount of a given brand remaining at any given time. After I have collected this data I wanted to perform some time series analysis using the ARIMA model and execute it on an Apache Spark cluster. Rough architecture diagram is attached below.
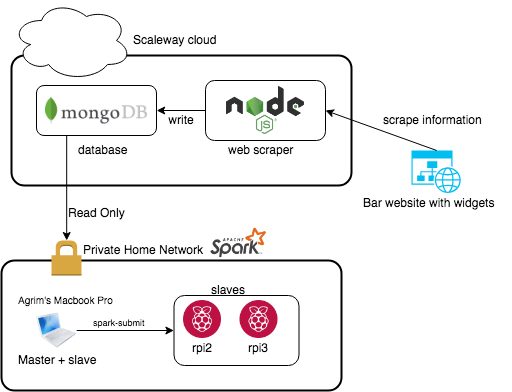
First implementation of the project

So the website I was trying to scrape had a widget that shows a small barrel which would change color / height of filling depending upon how much beer of that particular brand was left behind. I needed to parse some CSS so I found cheerio.js to be helpful in ingesting html and rendering the required elements correctly. Once that was done using some simple mathematics I was able to compute the percentage remaining. Attached the censored source code for the scraper below

I ran the above for about 2 weeks on one of my VPS’s. Once I had enough data I went ahead and began implementing the ARIMA model code which I got from here.

So initially it was taking forever to run the model on two raspberry pi’s plus my macbook, So I decided to add some more resources and scale up my solution. Using the brilliant scaleway cli I spun up 2 VC1M instances and added them as slaves in my deployment. That changed my architecture as follows.
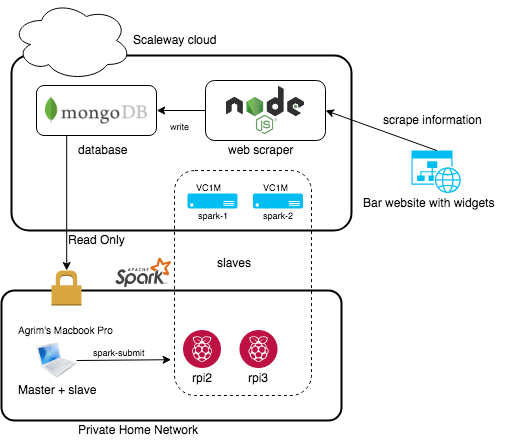
Adding additional compute nodes as slaves

The great thing about the scaleway cli is that its commands resemble the docker cli ,which is in muscle memory for me. I could spin up/down vms on the fly just like I would do with docker containers. This made the project a lot more affordable as I could spin up the compute nodes only when I want to run the model. I had to do a small hack by running a local tunnel on my macbook so that the vms could call into my laptop. So now that all the sunshine and rainbows part is over lets get to the actual scrutiny of the project.

So why did this project fail ?

  • Data was very inconsistent.
  • CSS rendering was inaccurate leading to bad measurements.
  • Not enough samples were collected.
  • Database was not ideal for time-series data analysis

What were the key learnings of this experiment?

  • Apache Spark is an amazing distributed computing engine that can be setup easily and runs across different architectures ARM,x86 etc due to the portable nature of the JVM.
  • Data is the new gold, without good data you cannot do any kind of useful analysis.
  • We are living in an awesome timeline where we can request resources dynamically and pay only for what we use.
  • Always do some basic groundwork like a technical evaluation before starting any project.

Thats all for this blog post stay tuned for more exciting and successful projects coming up!

Disclaimer: I have tried not to mention any brands/locations or url’s for privacy reasons. Also contributions are welcome!

https://github.com/agrimrules/brewery

Cam-ou-flage

Categories AWS, Computer Vision, Docker, Photography, Raspberry Pi

Hey Everyone,
Sorry for the lack of updates, I have been working on something so awesome it should technically be 3 blog posts and not one. It was such an intense project that I ended up bricking one of my Raspberry PIs by corrupting the memory card and causing segmentation faults. The entire fiasco is also what slowed down my progress. But anyways to start off this new year I wanted to shift my focus on upcoming and bleeding edge technologies like OpenCV. The overall idea is to find the most dominant color in a given frame so that if something was to remain camouflaged it would have the best chances with the chosen color. To implement this I used K-means clustering to divide the image into two sections and determine which color occupied the most space. The efficiency of this algorithm improves as we increase the value of K (the number of clusters). But for the sake of speed I chose to use only 2 clusters. Here is what the algorithm looks like

  1. Capture video using RPI camera
  2. Stream the video as a supported format MJPEG
  3. Load the video into OpenCV
  4. Process every frame as a Numpy Array
  5. Reduce the size of the Image for easier computation
  6. Using K Means Cluster create a histogram with K sections
  7. Determine largest section in histogram
  8. Render color on 8×8 LED Grid

The solution architecture is as follows
Abra Kedabra!

At first, I tried to everything using only my 2 raspberry pi’s but the problems I face was that it took 14 hours to compile! and the performance was incredibly poor. So I thought it was best to delegate the responsibilities to a container in the cloud which was very easy to setup and configure. They are 3 main components in the system.

  1. MJPEG streamer (here)
  2. AWS EC2 CV instance
  3. REST API for the SenseHat (by yours truly)

Check it out in action.


So after installing the MJPEG streaming module on my Pi2 I wrote a simple wrapper shell script for it.

This would create a MJPEG stream at 'http://< rpi-ip >:8080/?action=stream'
The next step was to consume this stream in AWS. I created a simple base container using the anaconda framework for python. setting OpenCV was as easy as conda install opencv . Next is the meat of the project code for which is shared below.

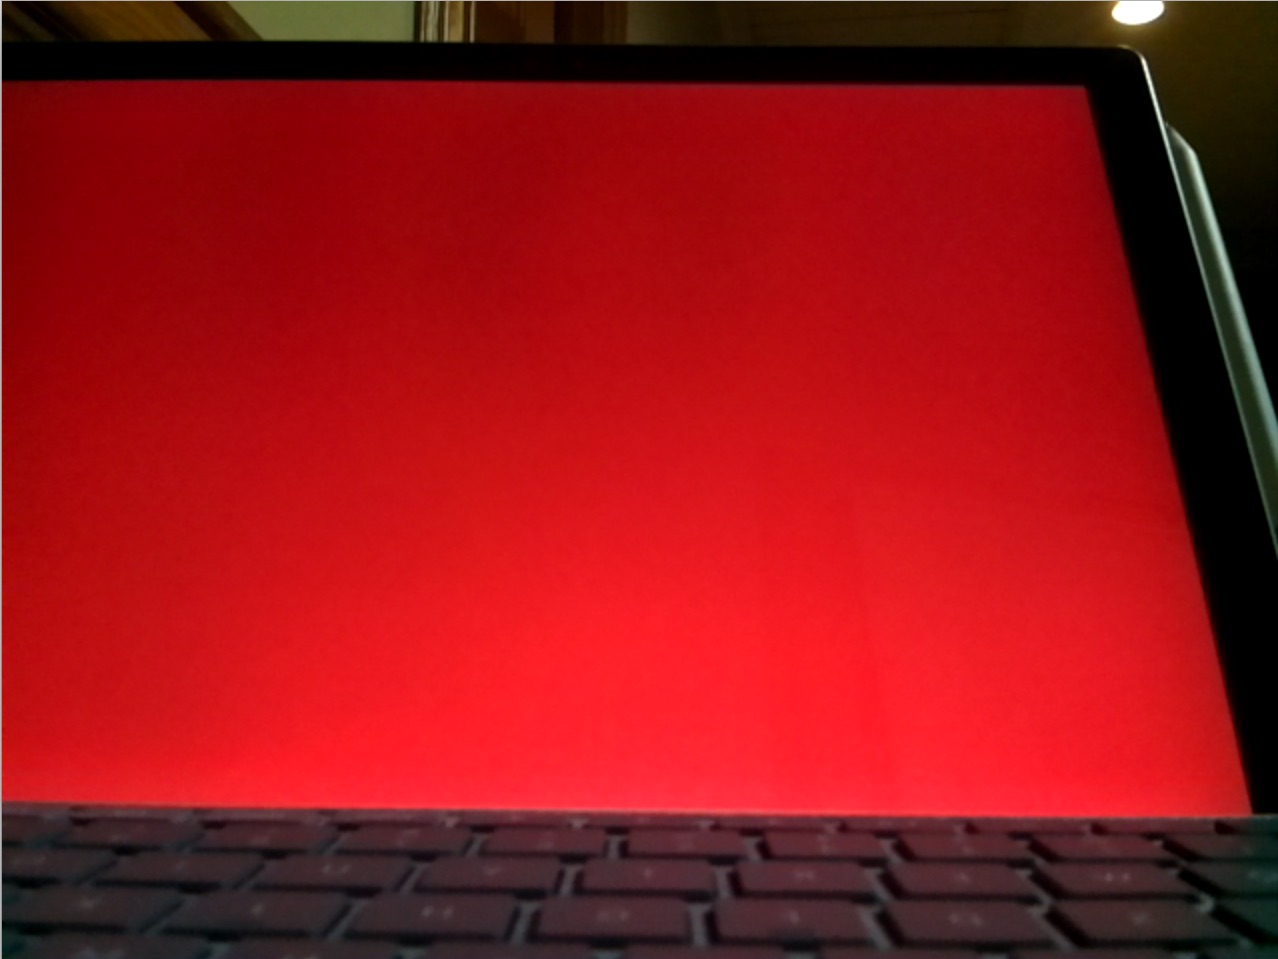
So this is what the EC2 container sees.

Input
Input

And this is the histogram generated after K Means clustering.
Output
Output

As you can see Red seems to be the most dominant color in the frame. You can tell by the amount of time taken for the neural network to compute the dominant color that this project is in an infancy stage. Let me mention the scope for improvement for this project.

  1. It is fundamentally wrong to use a value of k=2, I need k to be the exact number of different colors
  2. To provide the color for the LED board I should use a pub-sub system instead of REST as acknowledgment of request is not necessary
  3. In order to achieve true camouflage only computing to colour is not enough I need to figure out patterns and textures
  4. Overall performance of the system must improve by using a distributed system approach like (MPI) or tweaking the algorithm

Hope you guys liked my project. Look forward to more bleeding edge projects in the year ahead

Raspberry PI LED-API

Categories AWS, Docker, IoT, Raspberry Pi

I received a very fortunate gift recently a B1248 LED badge. The led badge came with support software that ran only on windows and worked fairly well. However, given my love for engineering, I began to look around for ways to program it and gain complete control over it. I stumbled upon a fantastic library. This worked almost completely out of the box on my Raspberry Pi 3. However merely implementing something someone else has developed is more of an operations task. Me being on the development side of things thought of ways to improve it and I came up with this.

Solution Architecture for the LED-Api

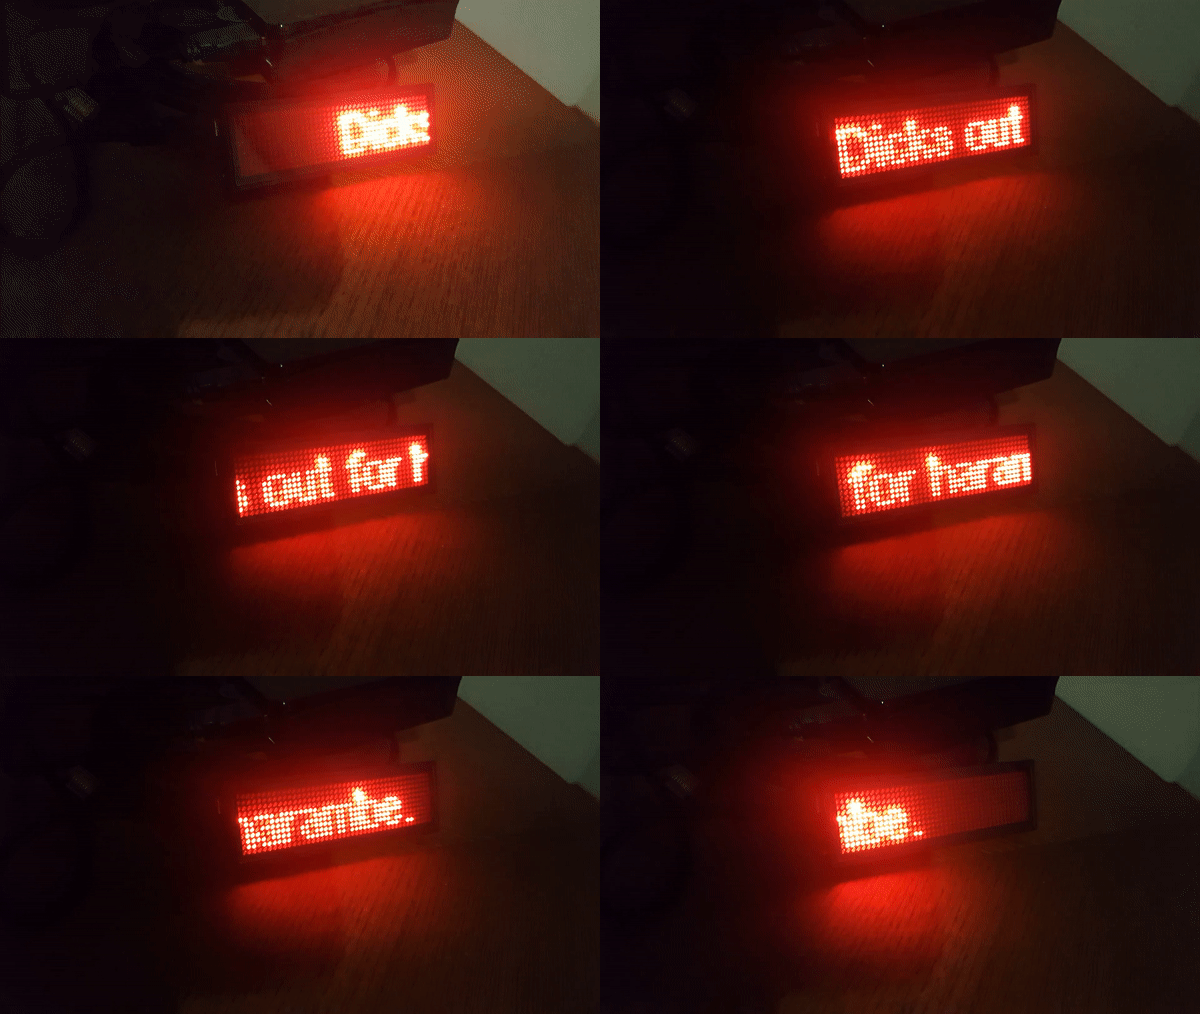
I build a simple flask app around it and gave it a REST interface. Sample code for which can be found here. I am always open to pull requests and public contributions. However, building a REST API wasn’t enough for me so I went ahead and ‘Containerized’ the app meaning that we would have to ironically use ‘-v’ during ‘docker run’ to mount a port. This REST API can be used to transmit very useful and critical information such as the example given below.

Public Service Anouncement

The original idea was to monitor all my VPS’s and check for downtime. However the library I use doesn’t support multi line text, which makes it not very useful to have lots of text in a marquee. It would also be really nice if this could show the current response time for all my API’s.

Scope for improvement:

  • Figure out multi-line text.
  • Separate the 2 processes into their own microservices.
  • Implement a queueing mechanism such as Kafka or RabbitMQ to read from MySql.
  • Further Extend the API to show either weather information or trending #tags.

Raspberry Pi Timelapse.

Categories Photography, Raspberry Pi

Here is my attempt at shooting a time lapse video on the raspberry pi 2.

This serene sequence is a fantastic fusion of art and technology shot and processed on hardware that costs < 60$. Let me first show you the camera I used to create this time lapse.

Rpi2
Say Cheese

The Raspberry Pi2 comes with a dedicated CSI (Camera Serial Interface) that takes a ribbon cable. Thankfully the camera I used had native support on the RPi2 so I didn’t have to install any other drivers. It was literally plug and play. Luckily I had a case with an opening that allowed for the ribbon cable to pass through it.

The Setup
The Setup

The Raspberry Pi2 was connected to a 10,000 maH power bank. I originally expected it to last about 24 hours but later learned things the hard way. The Rpi2 pulls about 400mA of power meaning it should Ideally have run for 10000/400 = 25 hours on a full charge. How ever I forgot to compute the battery efficiency of 70% which cause it to die about an hour before sunset during a previous attempt, footage of which has been attached below.

Once the camera is plugged in we do

$ sudo raspi-config

and make sure we enable the camera interface and restart the device. then a simple

 $vgencmd get_camera 
# which should return
supported=1 detected=1

Else check all connections including the ribbon connected on the camera module below the lens that has to be pressed firmly in place. To test the quality of the camera by taking a full photo. we can use raspistill.


$raspistill -o test.jpg -vf -awb auto -ex auto 
# What this means is
#
# -o is to specify the output file for the picture.
# -vf is to vertically flip the image (since my camera was attached upside-down).
# -awb sets the auto white balance on.
# -ex sets automatic exposure.

Since the camera is interfaced at a GPU level we wont be able to get a preview of the camera using a VNC server which makes framing the time-lapse difficult. To over come this we install vlc media player to create a live stream on the pi

$sudo apt-get install vlc

and then we simply run


$raspivid -o - -t 0 -vf -w 640 -h 480 -fps 30 | cvlc -vvv stream:///dev/stdin --sout '#rtp{sdp=rtsp://:8554}' :demux=h264 
#Which means use raspivid to take a video that is vertically flipped
#with a resolution of 640 x 480 at 30fps
# Then pipe the video to vlc media player and create
# an RTSP stream at rtsp://'raspberrypi ip':8554/
# which is encoded using h264

This stream can be opened using vlc media player on any tablet/computer or device as far as it is on the same network.
There is a very nice python library that I used to create the time lapse.
Here is the github gist of the program I used to create this timelapse.

I store all images in an S3 bucket because it makes viewing the images a lot easier. Because the camera can only be used by one application at a time so its not possible to access the live feed and run a time lapse at the same time. Upload the images to an S3 bucket means I can see the recently taken images with ease by accessing the public url of the content.
Scope for improvement:

  • Complete support for sunrise time-lapses
  • Add ability to change camera settings at a given time of day
  • Add support to share images/video outside of AWS.