/gifsuggest slash-command

Categories AWS, Docker, Lambda, RealTimeMessaging, Slack

We have all heard of IaaS, SaaS and PaaS offerings. But I recently came across AWS Lambda, which I would like to define as RaaS (Runtime as a Service). So what AWS lambda provides is an execution environment for running NodeJS and Python code in a completely Serverless/Stateless manner. which means all we have to do is write code that conforms to the specs of a lambda function and let AWS handle the scaling and execution of the code. The good news being that it integrates well with many AWS services and you get billed only for the compute time you use. You can trigger a Lambda function in response to many events such as an S3 upload or a change in a Code Commit repository. Since I wanted to play around with this technology I thought of building a slash command that suggests gifs for a given term. The solution architecture for this application would be as follows.

many moving parts
many moving parts

So the sequence of events is as follows.

  1. When we type in /gifsuggest "something" slack makes a POST request to our app, providing us with lots of information such as the user, team, channel etc. They also provide a response_url whos purpose I will explain later.
  2. Using the nginx config on my VPS I redirect the request to a containerized express app.
  3. Slack user experience guidelines enforce a rule which states that a response must be made in 3000ms or else the command is considered a failure. Which is why at this time I just send some placeholder text immediately to slack.
  4. The next step is we POST the search term and the response url to an API Gateway endpoint.
  5. The API Gateway is what triggers the execution of our lambda function.
  6. The lambda function GETs gifs using the giphy api.
  7. Finally using the response_url from earlier we POST the gifs and create a slack message. Slack allows us to use the same response url to create 5 messages in half an hour.

Below is the slash command in action.

Slash command in action

Now let’s get into the code. There are many moving parts in this application so I will show each microservice in the order of which they execute. The first is the express app that quickly replies to slack and then starts the lambda function. I have called this service slack-lb.

This app is run in an alpine Linux docker container with a nodejs environment.
The next microservice is the Lambda function itself.
There are 2 main parts of invoking a lambda function in javascript.

  1. Event: This contains the data that is being passed into the invocation.
  2. Context: This contains the lifecycle information of the lambda function such as execution time remaining and other lifecycle hooks.

Amazon is nice enough to provide a NodeJS library that registers the AWS lambda context as an Express middleware. This makes migrating existing express apps to Lambda very easy. We just need to write a handler as follows.

and then register middleware in our express app.

To deploy the lambda function all we need to do is create a zip file with the node modules, the handler and the express app files and then upload them on AWS.

Benefits of Lamda:

  1. No need to manage any infrastructure.
  2. Automatic scaling.
  3. Easy monitoring using cloudwatch.

Issues with Lambda:

  1. Currently only supports NodeJS 4.3
  2. Only supports stateless applications
  3. No support for sending files

Scope for improving this project:

  1. Right now once gifs are sent the user still has to copy the url and paste it at the destination there should be a way to forward the gifs using message buttons.
  2. The app is using a public api key for giphy which is rate limited and not peak performance. Must get a production key
  3. Migrate the proxy slack-lb app into its own lambda function.

PS: A lot of people make this mistake but GIF stands for Graphical Interchangeable Format. which would mean that it is gif and not jiff.
P.P.S: Like everything I do this is opensource. Feel free to contribute

Raspberry PI LED-API

Categories AWS, Docker, IoT, Raspberry Pi

I received a very fortunate gift recently a B1248 LED badge. The led badge came with support software that ran only on windows and worked fairly well. However, given my love for engineering, I began to look around for ways to program it and gain complete control over it. I stumbled upon a fantastic library. This worked almost completely out of the box on my Raspberry Pi 3. However merely implementing something someone else has developed is more of an operations task. Me being on the development side of things thought of ways to improve it and I came up with this.

Solution Architecture for the LED-Api

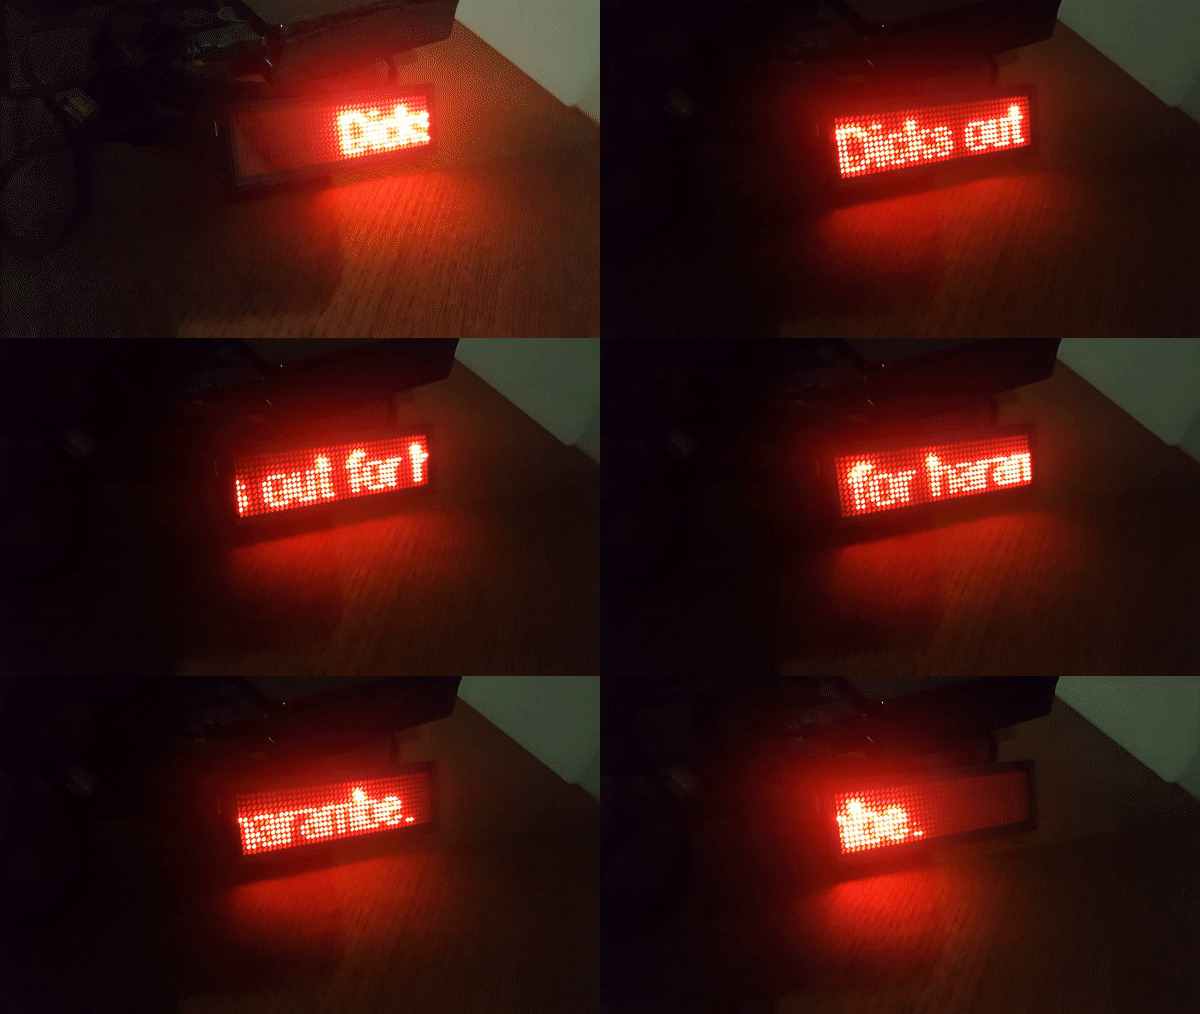
I build a simple flask app around it and gave it a REST interface. Sample code for which can be found here. I am always open to pull requests and public contributions. However, building a REST API wasn’t enough for me so I went ahead and ‘Containerized’ the app meaning that we would have to ironically use ‘-v’ during ‘docker run’ to mount a port. This REST API can be used to transmit very useful and critical information such as the example given below.

Public Service Anouncement

The original idea was to monitor all my VPS’s and check for downtime. However the library I use doesn’t support multi line text, which makes it not very useful to have lots of text in a marquee. It would also be really nice if this could show the current response time for all my API’s.

Scope for improvement:

  • Figure out multi-line text.
  • Separate the 2 processes into their own microservices.
  • Implement a queueing mechanism such as Kafka or RabbitMQ to read from MySql.
  • Further Extend the API to show either weather information or trending #tags.

Tizen Daylight App

Categories AngularJS, Tizen, wearable

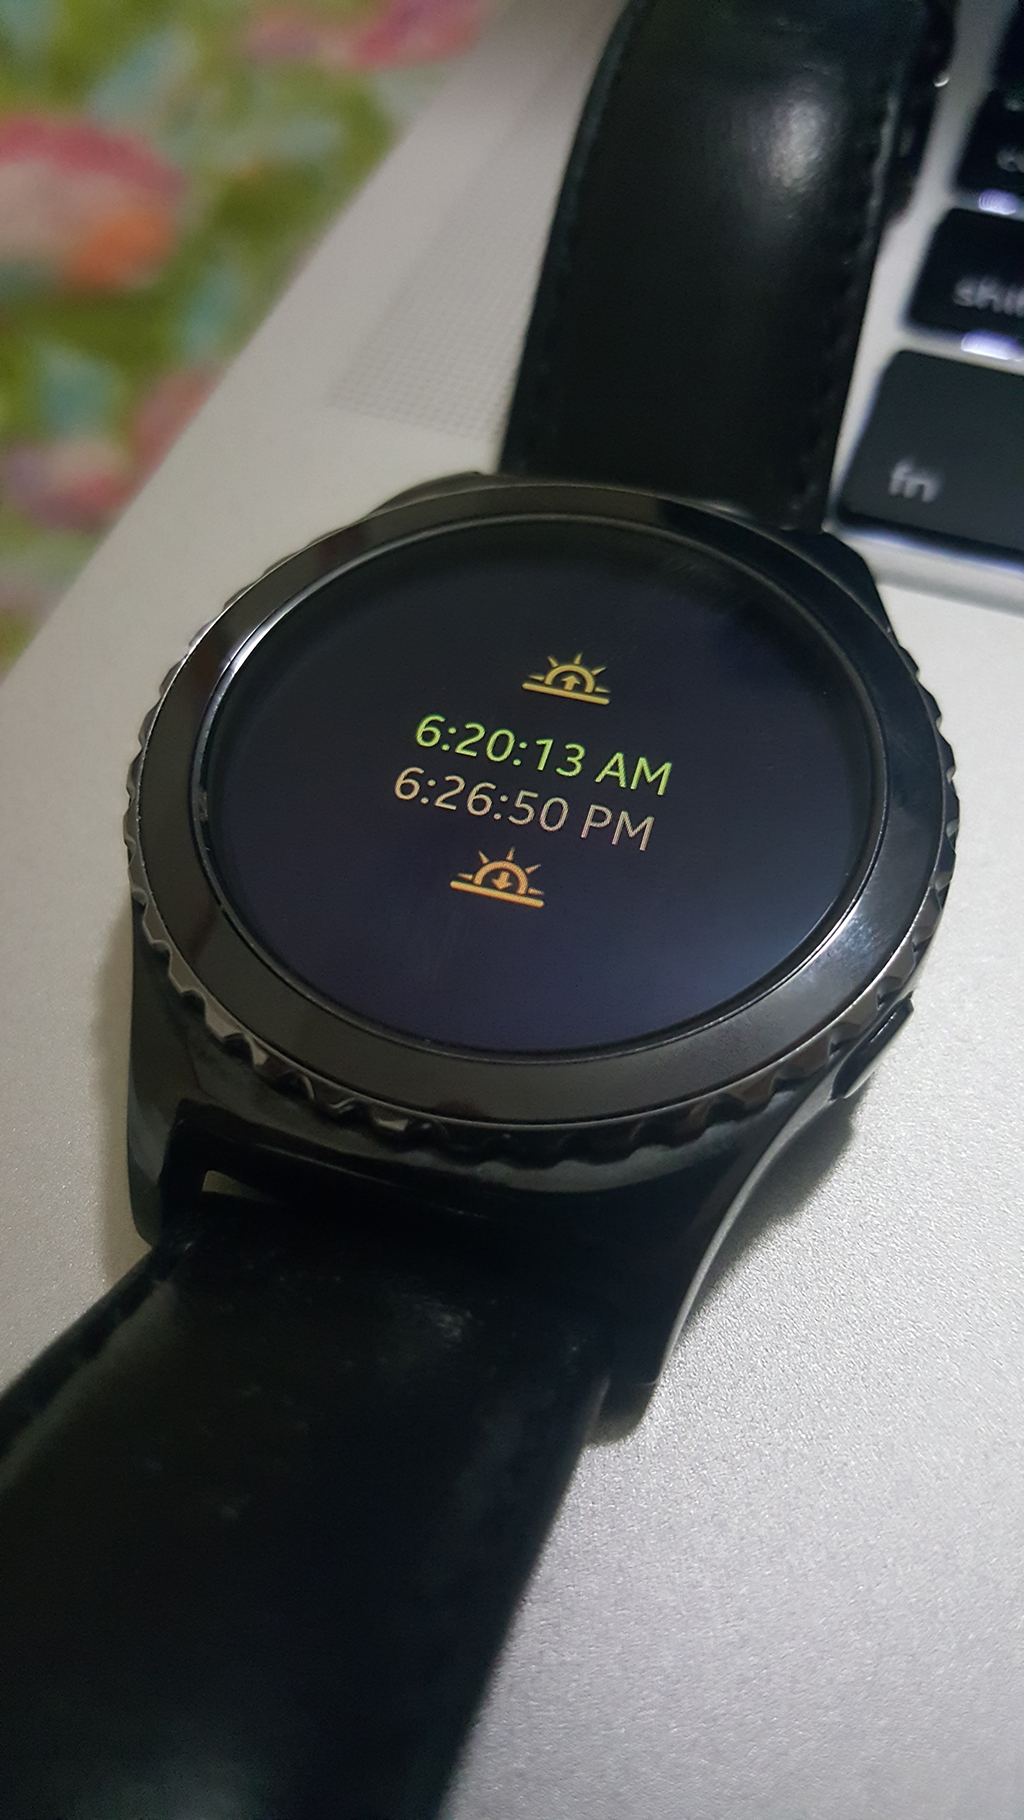
Here is my first app to be written on the Tizen OS for wearables. The purpose of this post is to share the story of how I came up with this idea and also all the valuable lessons learned in the process of development.

Daylight
The app with its simplistic UI

1. Component reusability:
Always design software to be as generic and reusable as possible. Remember my blog post about the time-lapse video taken using the raspberry pi?. I utilised both the same API’s and code from that program. Using the devices IP address I could fetch the time the sun was going to set/rise. I chose not to use the inbuilt GPS radio on the device for power efficiency and user privacy. Plus there was no need for such great accuracy in the user’s location for this use case.

2. Don’t reinvent the wheel:
Modern software development is very community focused and thanks to the information super-highway it is easy to keep track of the best practises and techniques. Always remember whenever you face an issue don’t forget to check out how the community reacts to it. because it is very likely that someone somewhere would  have faced or even solved the exact same issue. In this app I started by following the guides and writing primitive XHR requests that didn’t have promises or follow the reactive programming pattern. This is what the apps code base looked like originally.

The problem I was facing was that I was trying to do things synchronously in the land of asynchronous functional programming. I was assuming things would happen in the same sequence they were written in. But then it struck me that the app is basically javascript running in a browser so I decided to go the angular js way.

3. Always have fun:
Not all things are built with purpose. I found this app to be highly impractical and certainly not profitable. Which is why I have decided to open source it. But I learned a lot of things in the process and had a lot of fun during the development. I learned a lot about the Tizen ecosystem and wearable design in general. There is always something to be learnt.

Real Time editing
Real-Time editing

Scope for improvement.

  1.  Add the ability to set an alarm for sunrise or sunset.
  2. Change background color of the app to represent the sun’s current state (like f.lux)
  3. Provide more valuable information such as UV index.

I might be taking a small break from my blog as I am working on bigger things with my undergrad friends. Watch this space for more soon. Feel free to clone/contribute to this project on Github

Update (9/27/16): There was a daylights savings time bug where the times shown were off by one hour since they did not account for DST adjustments. This has been fixed by importing and using moment.js which does a good job handling anything time related.

Pokemon Go Slack-Bot.

Categories NodeJS, RealTimeMessaging, Reverse Engineering, Slack, Webhooks

This is my first controversial post on this blog. This week I developed a slack-bot that could notify a channel whenever a Pokemon was in the vicinity. The library I used has received a cease and desist order which is why I wont be sharing the code in this post. I do not encourage botting/farming in the game. The purpose of this post is to understand Webhooks and the Real Time Messaging Protocol. I do not endorse the library used or have any association with its developers, neither have I assisted in the development of the library in any way. The solution architecture of the app can be found below.

How to catch em all ?

I created a separate Pokemon Trainer Club account for use with the API, and hardcoded a given location for fetching pokemon. Once the API returns the list of pokemon in the vicinity I find the nearest one and compose a slack message object which looks like the following.


slack.webhook({ 
channel: "#general",
username: "Pokemon Alert",
text: "There is a " + pokemon.name + " at " + pkmn.distance + " meters",
attachments: [{image_url: pkmn.image}]
},url);

All pokemon found are written to mongodb along with their location and time of discovery, which can be used for later. After the 0.13 update to Pokemon Go, Niantic introduced some server side changes by implementing encrypted variables inside valid requests, which completely broke the library I was using. However if the contributors to the library manage to reverse engineer the changes and make it operational again one could continue developing this application. Anyone with academic curiosity about the project can shoot me an email and I will add you to my private git server where this repository is being hosted. Here is what The application looked like when it was running.

Private Slack

I also host my own slack team . I can give out invites if this app gets working again then you guys can see it in action. I would like to end this post on the usual scope for improvement section and also a valuable message.

Scope for improvement:

  • Make the whole project functional.
  • Allow for communication with the slack bot such as asking it to scan a particular location.
  • Perform some sort of Data analysis on the Pokemon found.

Go team Instinct!
Team Instinct

Raspberry Pi Timelapse.

Categories Photography, Raspberry Pi

Here is my attempt at shooting a time lapse video on the raspberry pi 2.

This serene sequence is a fantastic fusion of art and technology shot and processed on hardware that costs < 60$. Let me first show you the camera I used to create this time lapse.

Rpi2
Say Cheese

The Raspberry Pi2 comes with a dedicated CSI (Camera Serial Interface) that takes a ribbon cable. Thankfully the camera I used had native support on the RPi2 so I didn’t have to install any other drivers. It was literally plug and play. Luckily I had a case with an opening that allowed for the ribbon cable to pass through it.

The Setup
The Setup

The Raspberry Pi2 was connected to a 10,000 maH power bank. I originally expected it to last about 24 hours but later learned things the hard way. The Rpi2 pulls about 400mA of power meaning it should Ideally have run for 10000/400 = 25 hours on a full charge. How ever I forgot to compute the battery efficiency of 70% which cause it to die about an hour before sunset during a previous attempt, footage of which has been attached below.

Once the camera is plugged in we do

$ sudo raspi-config

and make sure we enable the camera interface and restart the device. then a simple

 $vgencmd get_camera 
# which should return
supported=1 detected=1

Else check all connections including the ribbon connected on the camera module below the lens that has to be pressed firmly in place. To test the quality of the camera by taking a full photo. we can use raspistill.


$raspistill -o test.jpg -vf -awb auto -ex auto 
# What this means is
#
# -o is to specify the output file for the picture.
# -vf is to vertically flip the image (since my camera was attached upside-down).
# -awb sets the auto white balance on.
# -ex sets automatic exposure.

Since the camera is interfaced at a GPU level we wont be able to get a preview of the camera using a VNC server which makes framing the time-lapse difficult. To over come this we install vlc media player to create a live stream on the pi

$sudo apt-get install vlc

and then we simply run


$raspivid -o - -t 0 -vf -w 640 -h 480 -fps 30 | cvlc -vvv stream:///dev/stdin --sout '#rtp{sdp=rtsp://:8554}' :demux=h264 
#Which means use raspivid to take a video that is vertically flipped
#with a resolution of 640 x 480 at 30fps
# Then pipe the video to vlc media player and create
# an RTSP stream at rtsp://'raspberrypi ip':8554/
# which is encoded using h264

This stream can be opened using vlc media player on any tablet/computer or device as far as it is on the same network.
There is a very nice python library that I used to create the time lapse.
Here is the github gist of the program I used to create this timelapse.

I store all images in an S3 bucket because it makes viewing the images a lot easier. Because the camera can only be used by one application at a time so its not possible to access the live feed and run a time lapse at the same time. Upload the images to an S3 bucket means I can see the recently taken images with ease by accessing the public url of the content.
Scope for improvement:

  • Complete support for sunrise time-lapses
  • Add ability to change camera settings at a given time of day
  • Add support to share images/video outside of AWS.